So, I saw this recipe on a 30 Minute Meals about 4 months ago (or more) and it struck me then as something I'd probably like, but never got around to making it, even though we always have the 3 ingredients in the house.
Ginger ale, vodka, and bitters. By the way, I'd like to give a pitch for the Smirnoff Triple-Distilled. Smirnoff gets a bad rap among vodkas. But I really have to sing the praises of this triple-distilled version. To me, it is v. smooth, virtually undetectable in a mixed drink. And it is very affordable compared to the heavy hitters of Grey Goose and Ketel One. So, just wanted to throw that out there.
And here's the final drink - I LOVED IT. It wasn't too sweet, wasn't alcohol-y tasting, wasn't too bitter from the bitters. Just a very nice, refreshing drink. I've never come across a cocktail or other adult beverage I could see coming home and kicking back with on a frequent basis - but this one could be it (if I so chose). It was really delicious.
Monday, June 30, 2008
Mmm...dip
So, Miss M did it again last fall when she shared the amazing recipe for Buffalo Chicken Dip with us. This dip went faster than any other food item at our first OSU-Michigan party (Nov 22, mark your calendars).
As with all my recipes it seems, you start with a creamy base - in this case, cream cheese and chunky blue cheese dressing
Then the magical elixir....real AUTHENTIC Anchor Bar wing sauce
See how orangey the creamy mixture gets?
Meanwhile, over on the other counter, Mr. R was shredding a rotisserie chicken....
Then, most of the non-ick parts of said chicken were added to the base....
Spread into a casserole dish and bake at 400 degrees until hot and very bubbly
Like this
Serve said dip with bread or tortilla chips and a cold beverage of your choice...
Large loaf of meat dinner
Yeah, so I've been craving hash brown casserole for ages it seems like...so it had to become a part of a weekend meal of food. And what goes with HBC? Meatloaf of course. And what is a great meatloaf - the Meatloaf Cordon Bleu care of Miss M in Buffalo!
I won't tell you how to make meatloaf - every family has their own magical mixture of meat, bread or breadcrumbs, milk, egg, seasonings. Then you press said meat mixture out onto a washable surface and layer lovely ham and swiss on top....
Then roll up and squish into a giant casserole dish and decoratively top with ketchup (sooo classy)
Meanwhile, onto the HBC. Here's the creamy base - butter, cream of chicken soup, sour cream...
Cheddar cheese added...
Then a package of frozen potatoes...and into the baking dish we go...
Crunchy cornflake and butter topping added and an hour in the oven and voila! HBC!
Part of a balanced dinner served with mushy canned green beans...R's favorite! As you can see, the "loaf" tried to break apart as it was wrenched from the overstuffed casserole dish...normally my meatloaves hold together a bit better. But regardless, it was still tasty!
Monday, June 23, 2008
Cheesecake nightmare
So, again, I had a huge craving for cheesecake on Sunday. I dashed off to the store to get cream cheese and graham crackers to make said cheesecake. It was a wasted effort. This cheesecake was bad news.
Things started off poorly. I had intended to use Ina Garten's cheesecake recipe - a recipe I've made several times in the past with usually good results. HOWEVER, when I got home from the grocery store, I realized I only had two pounds of cream cheese, not two and a half pounds. So, I did some research and came across this Emeril recipe that required only two pounds of cream cheese. Little did I know that using this recipe would put me on a path to horrifying cheesecake.
It started off innocently - butter, sugar, cinnamon, and graham cracker crumbs are baked off to form the crust.
Then our creamy core - 4 packs of cream cheese (the butter went into the crust, but it wanted to pose with its fatty friends):
Blend blend blend the CC with sugar, eggs, vanilla, etc. This is where the recipe started to get weird - I've never made a cheesecake with flour in it.
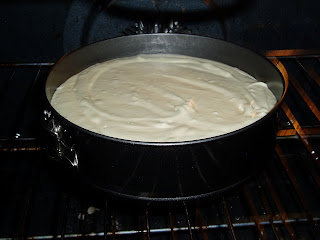
Pour into crust...bake...
The recipe said 55 to 1 hour 10 min. After 55 min, the cheesecake was slightly less brown than here but was still REALLY jiggly. This is after 65 minutes - it was so burned I knew it had to come out, but it was still fairly jiggly.
My husband cut off the top of the cake, to reveal the mealy grossness underneath.
Here is a slice of this hell-cake. It was NOT good. It did not taste like cream cheesy goodness. It tasted like yuck on a plate.
Sigh. Will go back to my good friend Ina from now on....
Sunday, June 15, 2008
While the cat's away....
Mr. R went out of town this weekend, leaving me by myself to...well, cook my head off basically. Below you will find an outline of my weekend - cooking and baking intermixed with re-reading all the Harry Potter books.
To whet your appetites - the highlights:
Sticky buns
Saffron risotto
To whet your appetites - the highlights:
Sticky buns
Saffron risotto
When life gives you saffron, make a risotto!
I love risotto. But for whatever reason, I've not made it in ages. Mr. R gave me saffron threads for my birthday in March and has been after me to use some ever since. So, I decided to make something that would show off the saffron without overwhelming it - a saffron risotto. I did a bit of research and landed on a Mario Batali recipe that didn't require unusual ingredients (beyond saffron) and didn't add in too much other "stuff" to take away from the saffron flavor, a Risotto Milanese.
First, we chop the onions:
And measure out the precious saffron threads:
The onions go into a large saute pan with some olive oil, while the saffron goes into the chicken stock to "infuse" the stock:Once the onions have softened, you add the arborio rice and let that get coated with oniony flavor. Then wine - then you start adding the bright yellow saffron/chicken stock - one ladle at a time. Here we are midway through adding the entire amount of stock:
And at the end. The arborio gives off starch to make a creamy texture.
Then, you add in a few handful of grated Parmesan and some butter at the end. Obviously, I needed more Parm before eating:
This was a tasty, basic risotto. To be honest, the saffron didn't blow me away. I could smell it in the finished product, but it didn't add any flavor. I guess Mr. R and I are used to jazzier risottos - stuff with some pancetta, or else a butternut squash/sage mix. It was a fairly subtle set of flavors. I'll keep my eye out for saffron recipes in the future!
Copycat sticky buns
So, Miss M called me and asked a question about what type of flour to use for sticky buns. She and Miss K had seem something on Throwdown with Bobby Flay re: sticky buns and were prompted to make them. After talking with her on the phone, I set down my book and turned on the TV, and lo and behold, the same episode of Throwdown was on. I was bored at home (Mr. R being away and all) and decided to make the sticky buns with a few modifications (since I didn't want to go out for any ingredients).
Now - I've blogged about my own cinnamon buns before. And those are pretty good cinnamon buns. But I was interested in trying a true "sticky bun" recipe - a breakfast concoction dripping with sugar and caramely goodness.
Since I didn't have any high-gluten flour on hand, I decided to search for another brioche recipe. That was how Joanne Chang was referring to the bread base for the sticky buns in her recipe. I remembered that Ina Garten included a homemade brioche recipe in Barefoot in Paris, so I modified that recipe slightly (upped the sugar, slightly upped the flour, lowered the salt just a bit). I prepared the brioche dough and let it rise overnight in the fridge.
This dough was interesting - it was very very soft and eggy. Here I am being proper and putting in eggs, one at a time:Knead dough, KNEAD
Hello my good friends - toss, in chunks, two sticks of butter into the dough as it whips around on the dough hook
Prepare a bowl to receive the dough - nothing bad ever came out of a buttered bowl
And our extremely sticky dough mass goes into said buttered bowl for a chilly night in the fridge
Here is the brioche dough after a solid 14 hours of rising in the fridge and coming to room temp
I prepared a very sandy cinnamon/white sugar/brown sugar mixture to fill the dough later on. The recipe calls for only brown sugar - but I decided to be anti-authority and put in a mixture of white and brown.
Now it is time to prepare the GOO - Melt the brown sugar and the butter
Then, off the heat, add the honey, cream, and some water. Hello Mr. Bear - give me your honey
Meanwhile, over on the island, the dough had to be rolled out to 1/4 inch thickness. I was close
And sprinkled with the sandy mixture. It was like playing at the beach.
I sprinkled some nuts over the sandy mixture - a mixture of pecans and walnuts mostly, but also some almonds on about 1/3 of the rolls, just for kicks. And rolled 'r up - a bit tricky given the delicacy of this dough, but I got it. After the rolling, this log of doughy goodness was sliced into 1"/1 1/2" slices.
Prepare the pans with "Goo"
Then nestle the naked buns in said Goo
Put the pans back in a warm place to rise for another 2-3 hours - this was at the 2 hour mark
Then bake at 350 degrees until browned. NOTE - Maybe it is due to using the lower-gluten AP flour, or my oven, or a combination of the two, but these buns were ready WELL ahead of the 45 minute mark in the recipe - more like 30 minutes. So keep an eye on them! As you can see, I need larger baking pans to prevent the evil triangle sticky bun.Let them cool in the pan for 10 minutes, then invert onto the serving platter to behold the gooeyness:These were definitely tasty - a departure from my standard cinnamon bun. If I make them again, I will definitely up the cinnamon. The recipe only called for 1 tsp, and I just really wanted more cinnamon flavor. These weren't particularly tricky to make - but you do have to allow a lot of time to make them. It would be a pain to try to make for, say, a gathering of friends at your house at 9 am on a Saturday morning. And I'm not 100% sure the buns would be well served to do a slow rise in the fridge, sitting in the goo, overnight. Will have to experiment more in the future!
Olive goodness
I know olives are a much maligned food item, but I find them delicious. And so, when I saw the Pioneer Woman recipe for olive cheese bread, I knew I'd be making it at some point in time. I just had to wait for Mr. R to go away for a weekend, so I could gorge myself on olive goodness.
First, I opened and drained one can of regular black olives. My parents can attest to an early love of the olive.
Then, I got a little crazier - some pitted Kalamatas, some Picholine, and some other type of large green Greek olive that was stuffed with a pepper:
Then, I got even NUTTIER and threw in one artichoke heart:
Meanwhile, over at the bowl, I've mixed some mayo (just a bit), some softened butter, and a lot of Monterey Jack cheese. I also, per PW, put in a couple of chopped scallions.
And then, the olives are mixed with the creamy mixture and slathered on top of some French bread.
I had a ridiculously thick layering of the olive mix, so mine baked in at 325 degree oven for around 40 minutes to achieve cheesey, browned goodness.
I'm not sure if a picture can convey the lovely buttery meltiness that occurs with this bread.The mixture begins to meld and melt into the bread as it bakes. This was a delicious treat to have while Mr. R was away. I WILL say though - if I were to make it again - I would be inclined to throw in some canned or fresh chopped and drained tomatoes. Or something like that - I felt like something was needed to counteract the briny saltiness of the olives. But I did enjoy the recipe a lot and will hopefully have reason to make it again soon!
Subscribe to:
Posts (Atom)